
Burp Suite is a tool or set of tools used for penetration testing of web applications, It is one of the most popular tools among professional web security researchers and bug bounty hunters. There are two versions of the burp suite, Community Edition, and Professional Edition, Community Edition is a free version but with limited functionality, which is sufficient for Beginners.
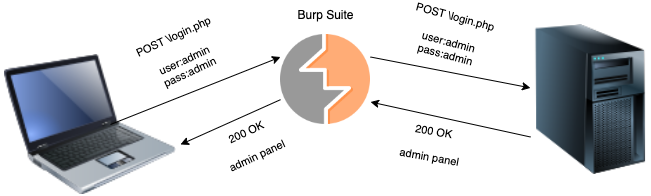
As we can see that the burp suite sits in the middle of the communication between user and website, and all the requests are sent via burp suite and we can play with those requests edit them and forward them.
Installing and Setup#
Downloading and Installing#
Let’s start with installing and setting up the tool, head over to the Port-swigger’s website, and download Burp Suite for your OS, Once downloaded Install it.
Configure Proxy Listener#
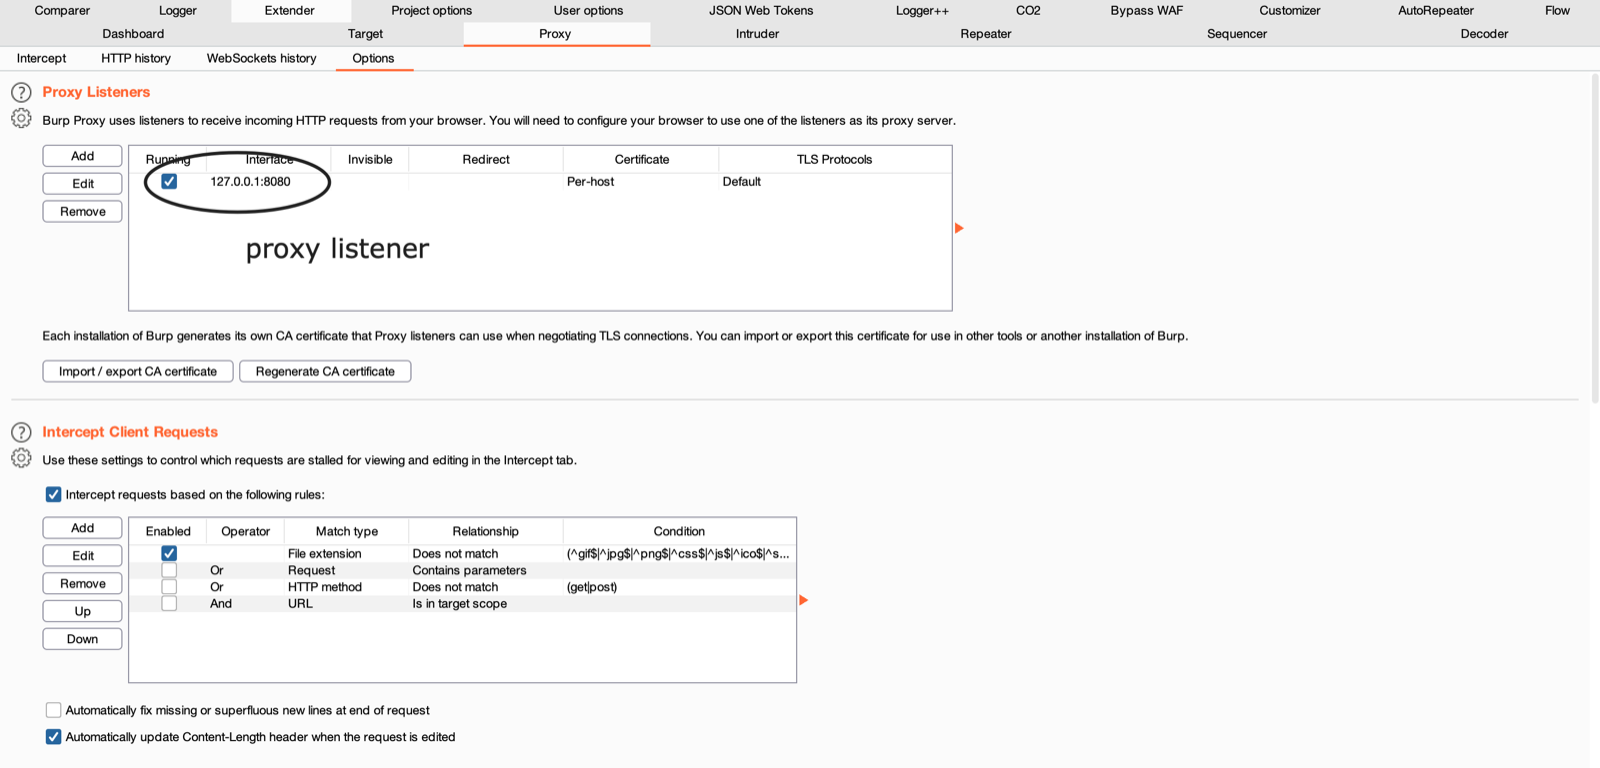
Open Burp-Suite, and head over to the proxy tab and select option from there and verify that the listener is active and the port is 8080,
Configure Proxy Settings in Browser#
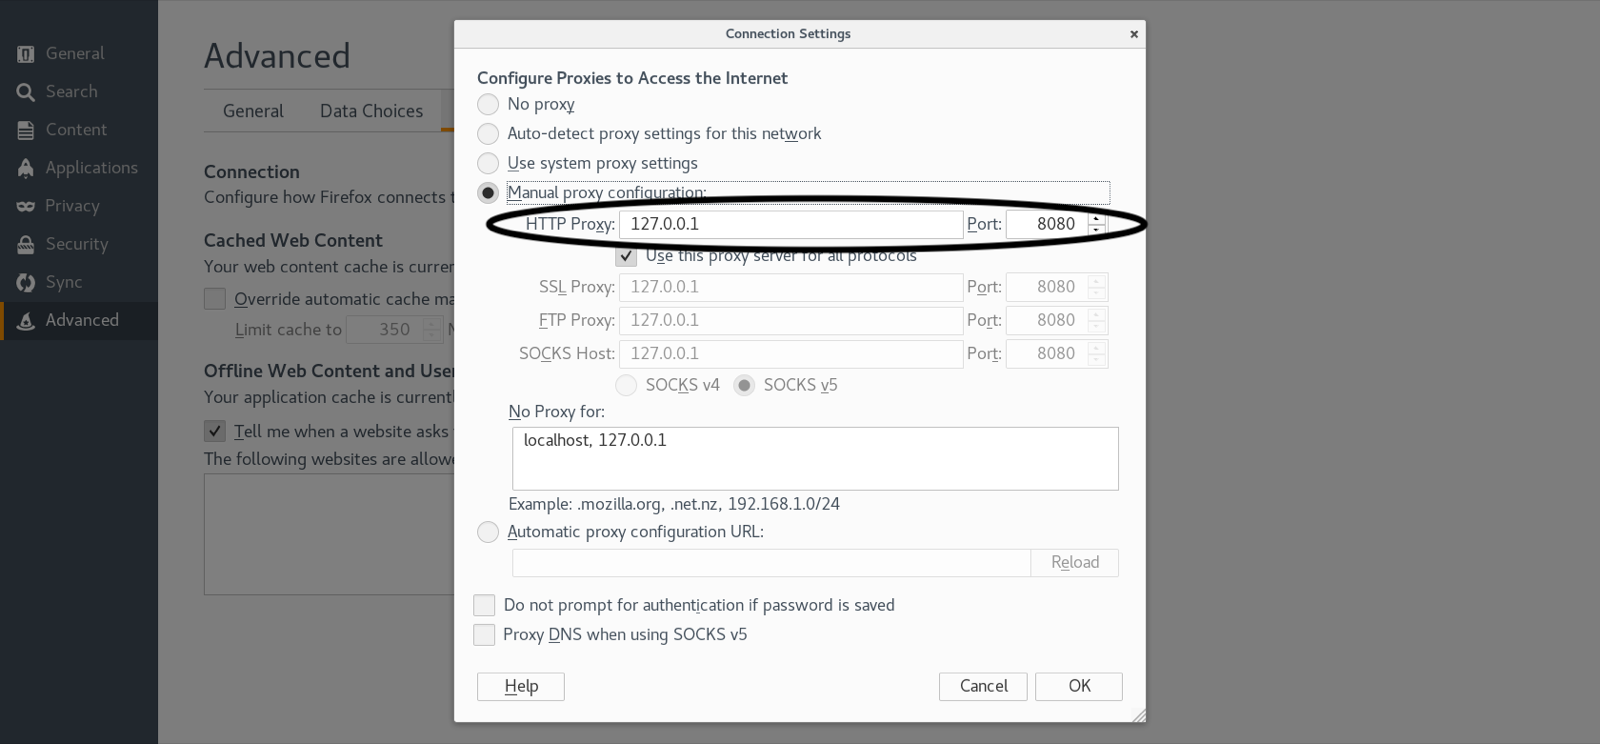
We have Burp installed and the listener is active on port 8080, now we need to configure our browsers to use Burp as a proxy,
💻 For Firefox: Navigate to preferences → advanced → network → settings, then turn on the manual proxy configuration, and set it to the local proxy as (127.0.0.1 on Port 8080)
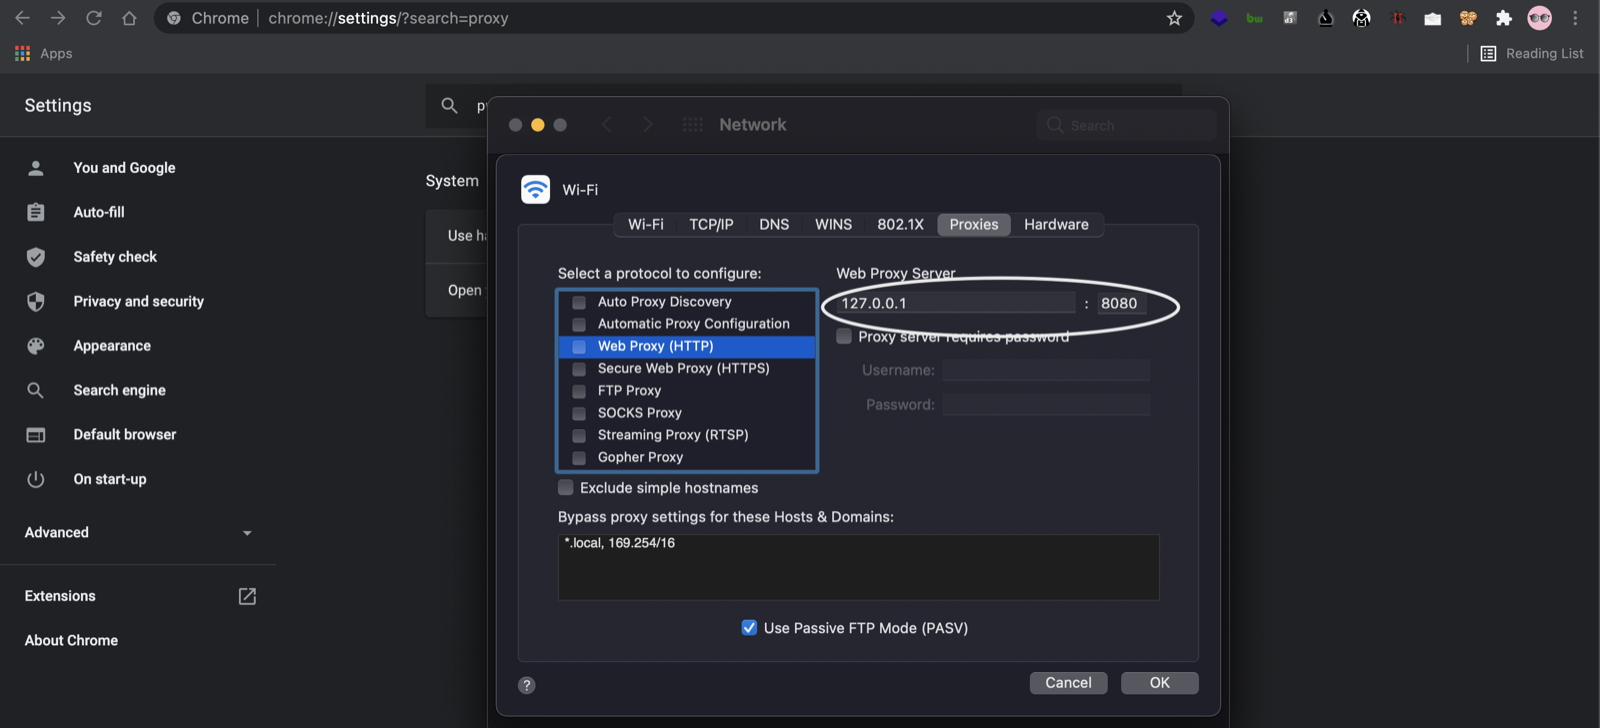
💻 For Chrome: Navigate to preferences → advanced → system → click on open your computer’s proxy settings → enable web proxy (HTTP) and set it to 127.0.0.1 on port 8080
Also, there is a way to easily configure and switch between these proxies using an extension.
Using FoxyProxy Extension: Install the extension FoxyProxy on chrome and firefox, Once installed we need to add the burp proxy (This need to be done only once) add the proxy give it a name, and add address 127.0.0.1 8080
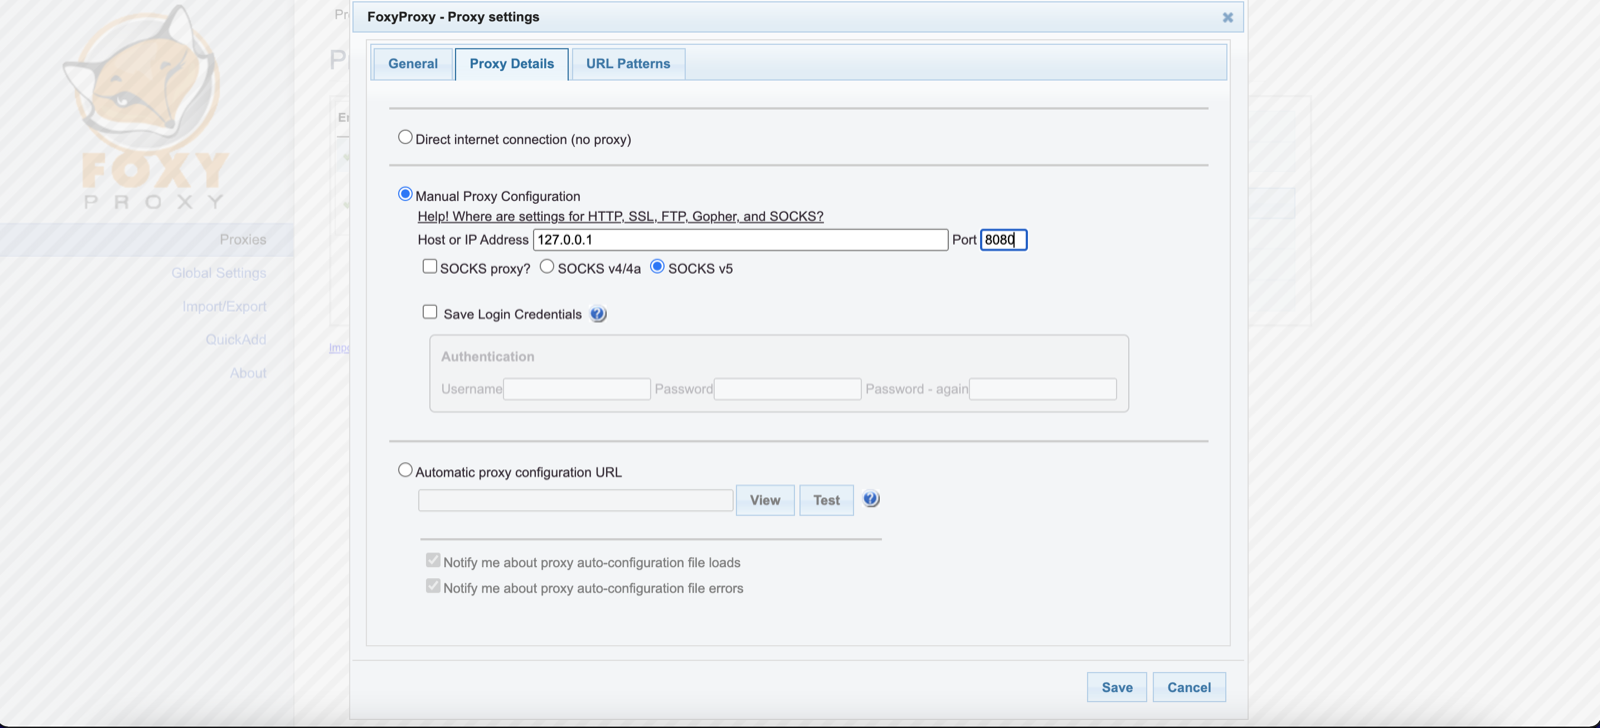
Now whenever we need to enable the proxy simply enable it by clicking on the extension and then selecting the Burp suite option as given in the below image

Installing SSL Certificate#
After all these configurations are done we can easily intercept the traffic of HTTP websites however we need to install the SSL certificate on the browser to access HTTPS sites.
First, We need to download the burp certificate by going to http://burp after enabling the proxy, and then clicking on CA Certificate on the top right corner.
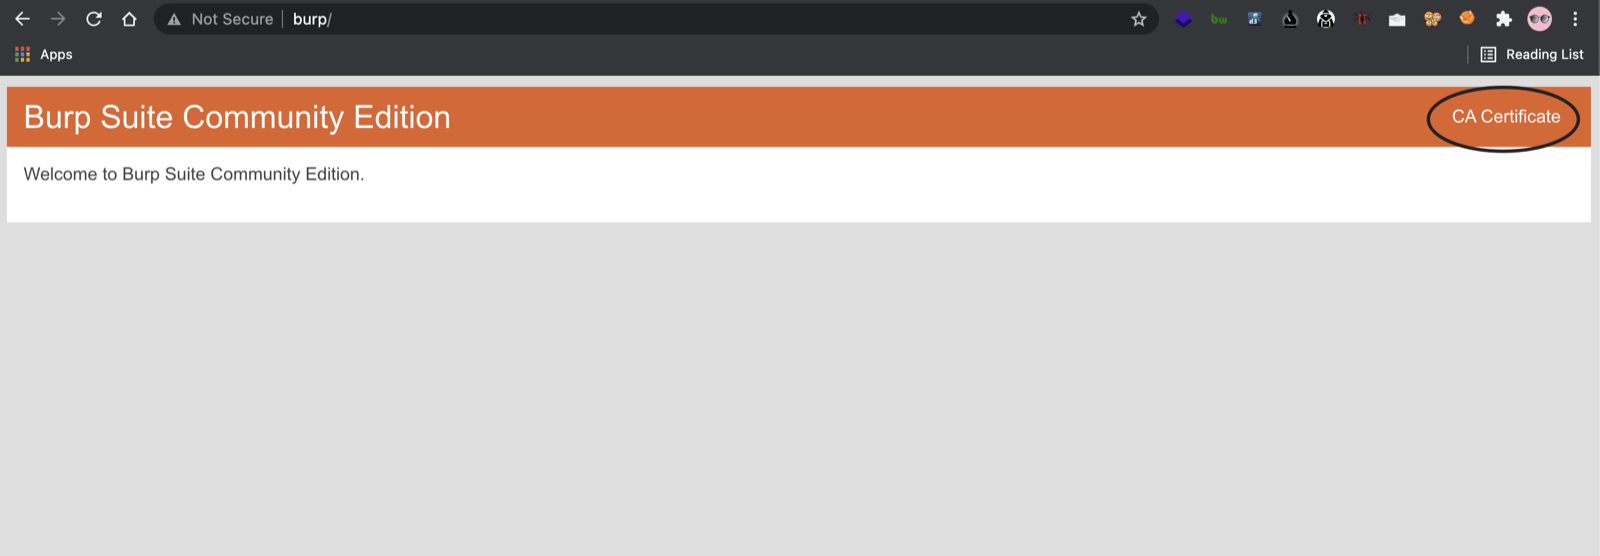
Head over to the security settings page in the browser, open advanced settings and click on certificates, Then import the certificate into the browser.
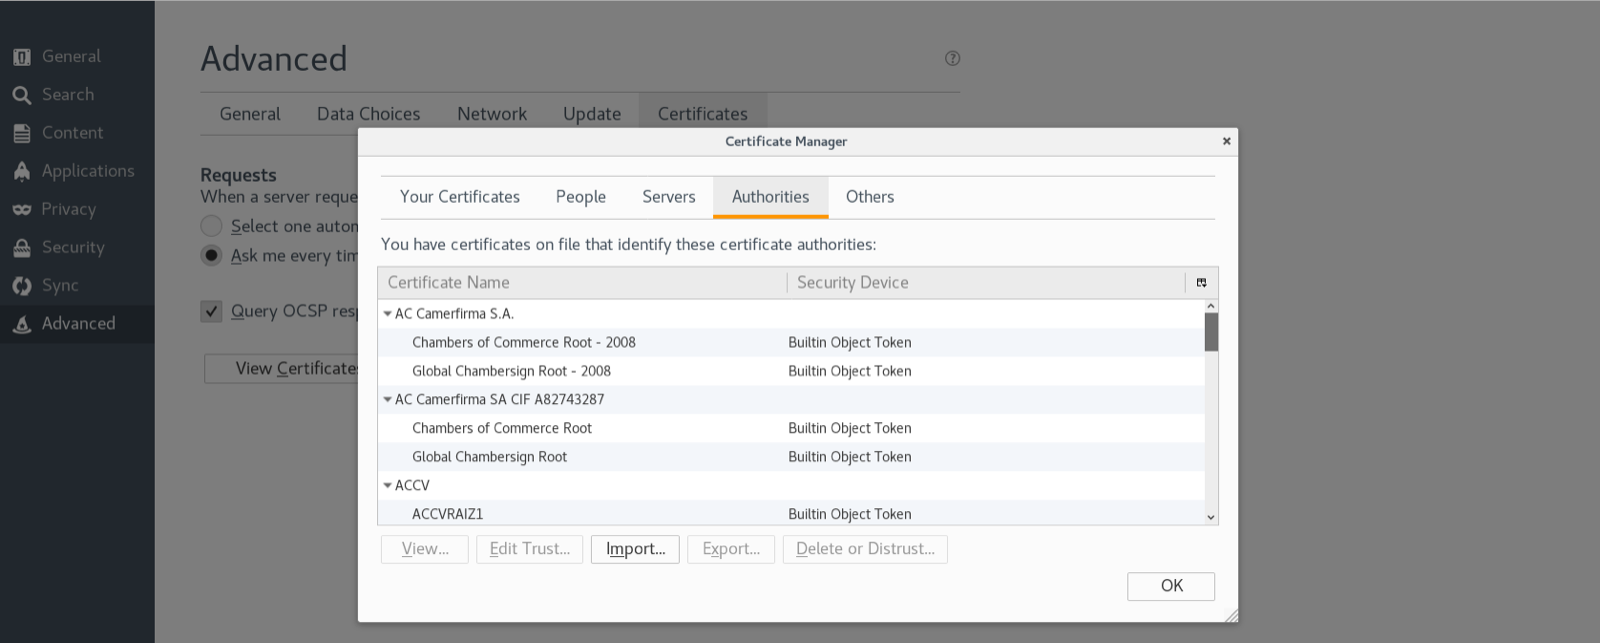
After all these configurations we should be ready to move forward
Features#
In this post we would look at the basic features of the Burp suite, We will look at the common tabs of the burp suite — Proxy, Intruder, Repeater, and Sequencer.
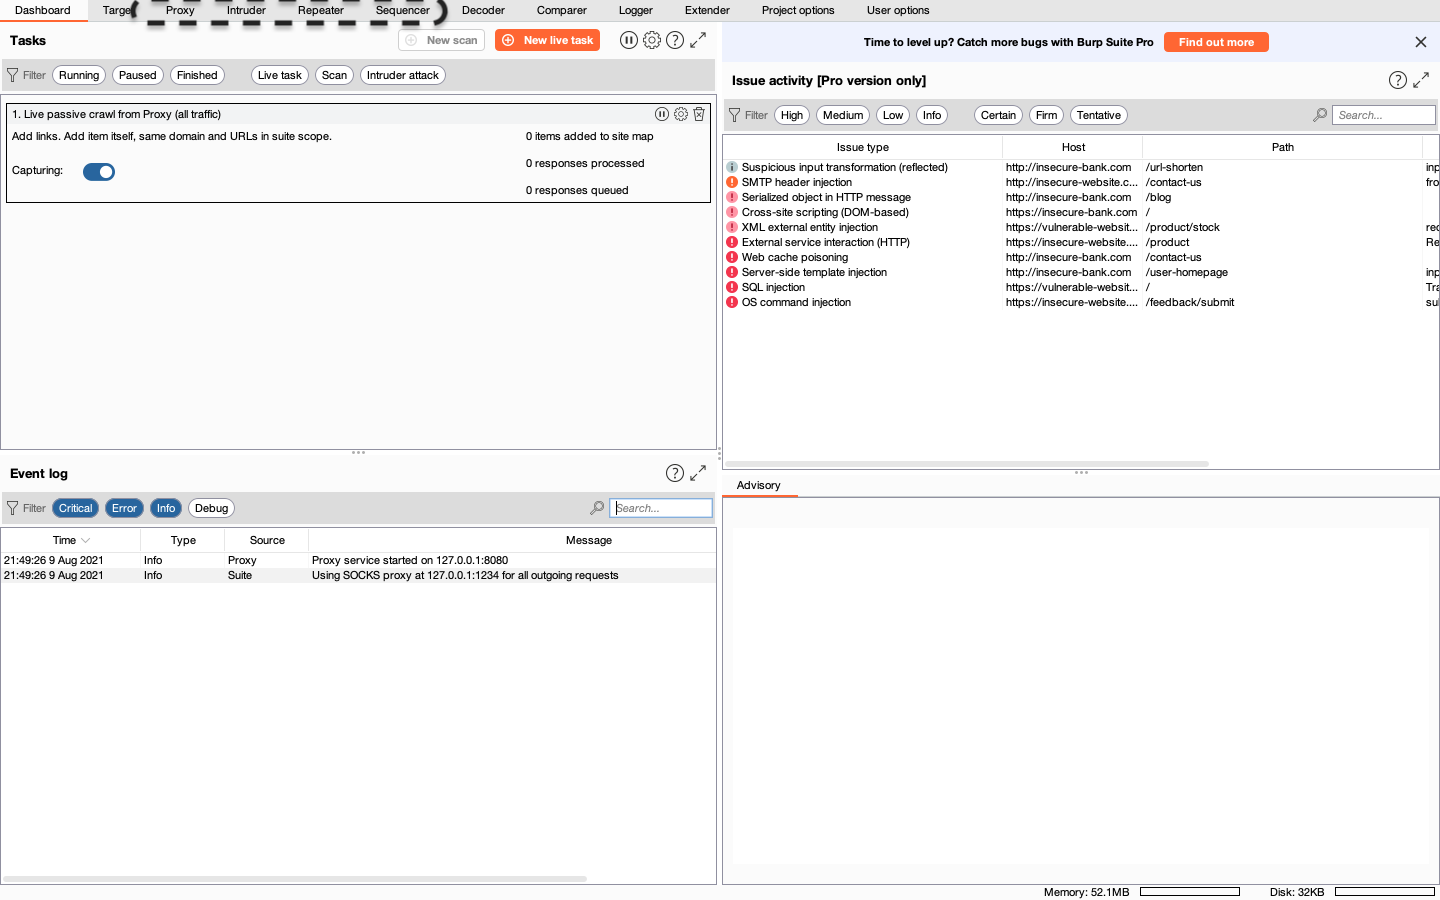
However there are various advanced features and many more features could also be added by the use of extensions, all that for another post.
Proxy#
The proxy tab is usually where you spend your most of time while testing a web application, This tab will log all requests your browser made.
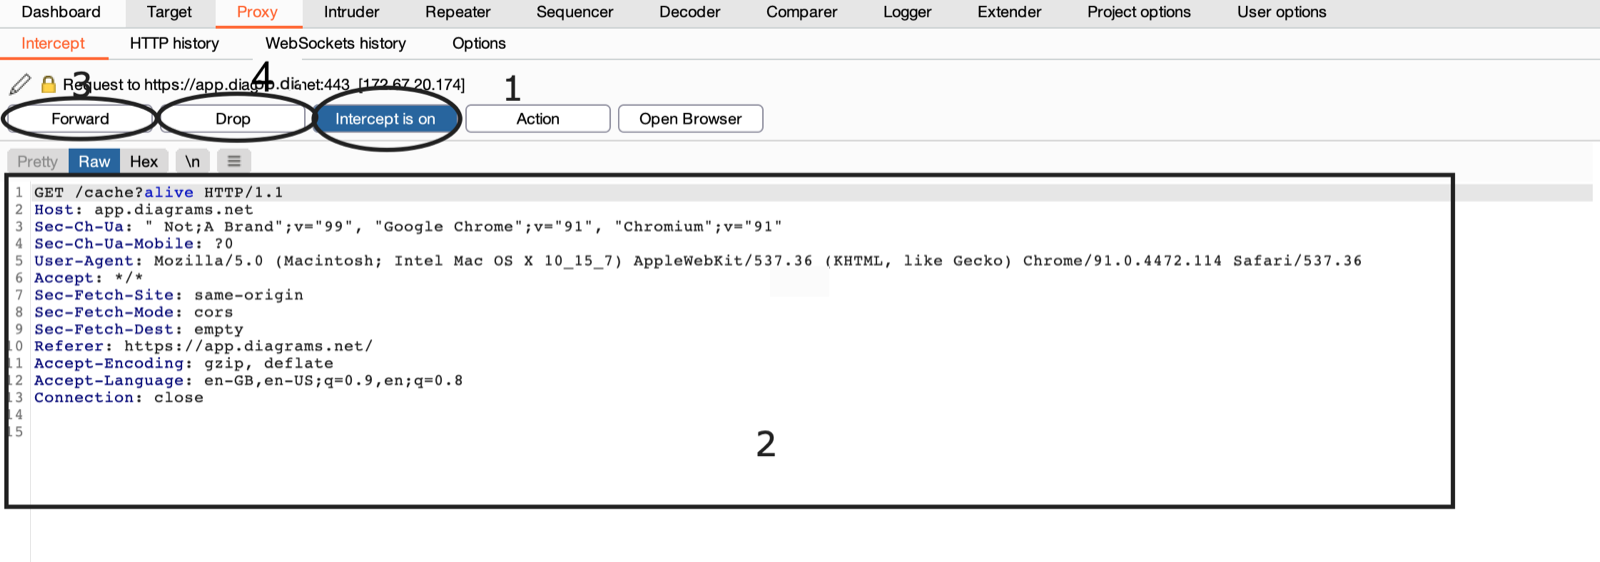
In the Image the 1. Button is used to turn intercept ON or OFF, The Intercept is used to stall the requests made by the browser until we either forward them or deny them. So as here we can see in the Area 2 There is a GET request, this is the request the browser recently made, now we as a user can modify this intercepted request, and then it is up to us to 3. Forward This request to the server or not, as we click the Forward button the request we modified will be sent to the server and then the server will respond accordingly, Also we could 4. Drop The request if we want to, then this request will be dropped by the burp.
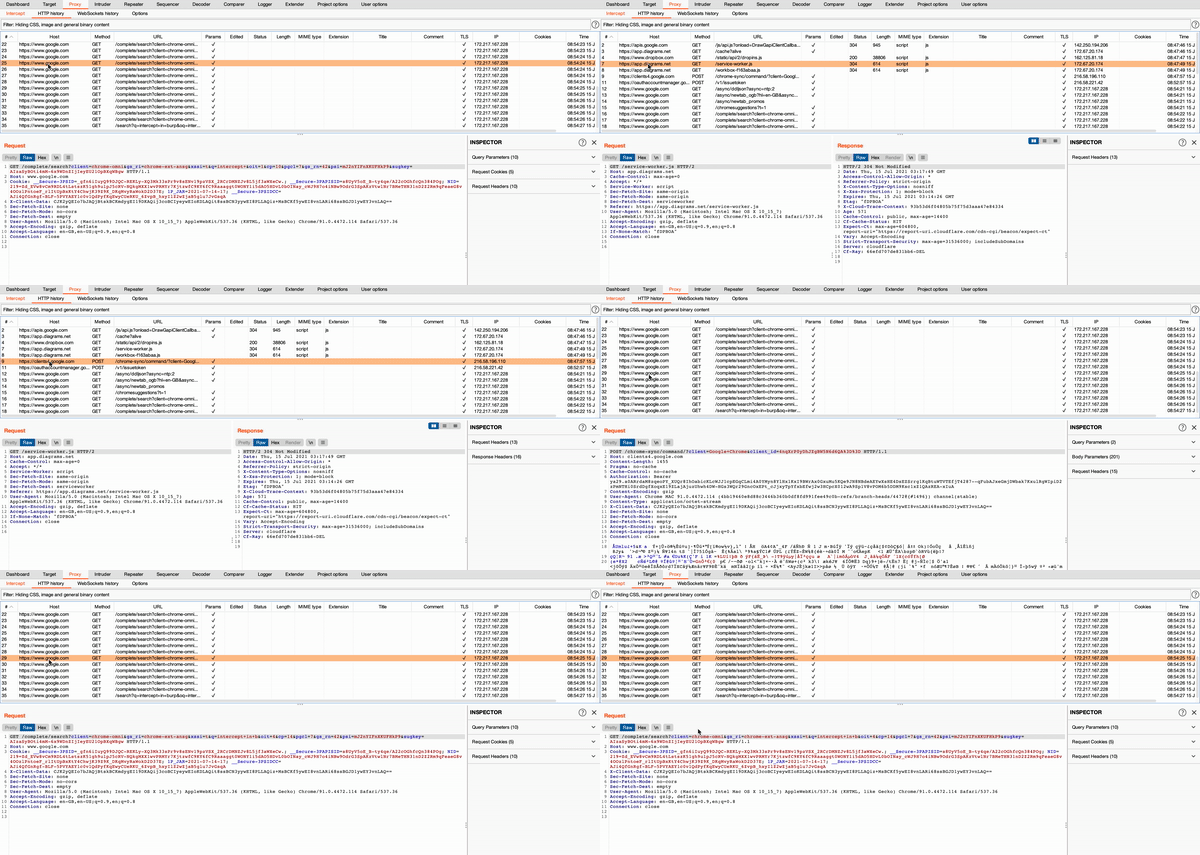
This intercepting request comes under active enumeration as we are modifying the requests that are being sent, However, we could also passively analyze the web application by simply running the Burp proxy and then Turning Intercepting OFF now as we poke around with the web application all the requests will be logged by burp {But this time they are not stalled} and we can analyze these requests later on, by going to the HTTP history option in proxy tab as shown below.
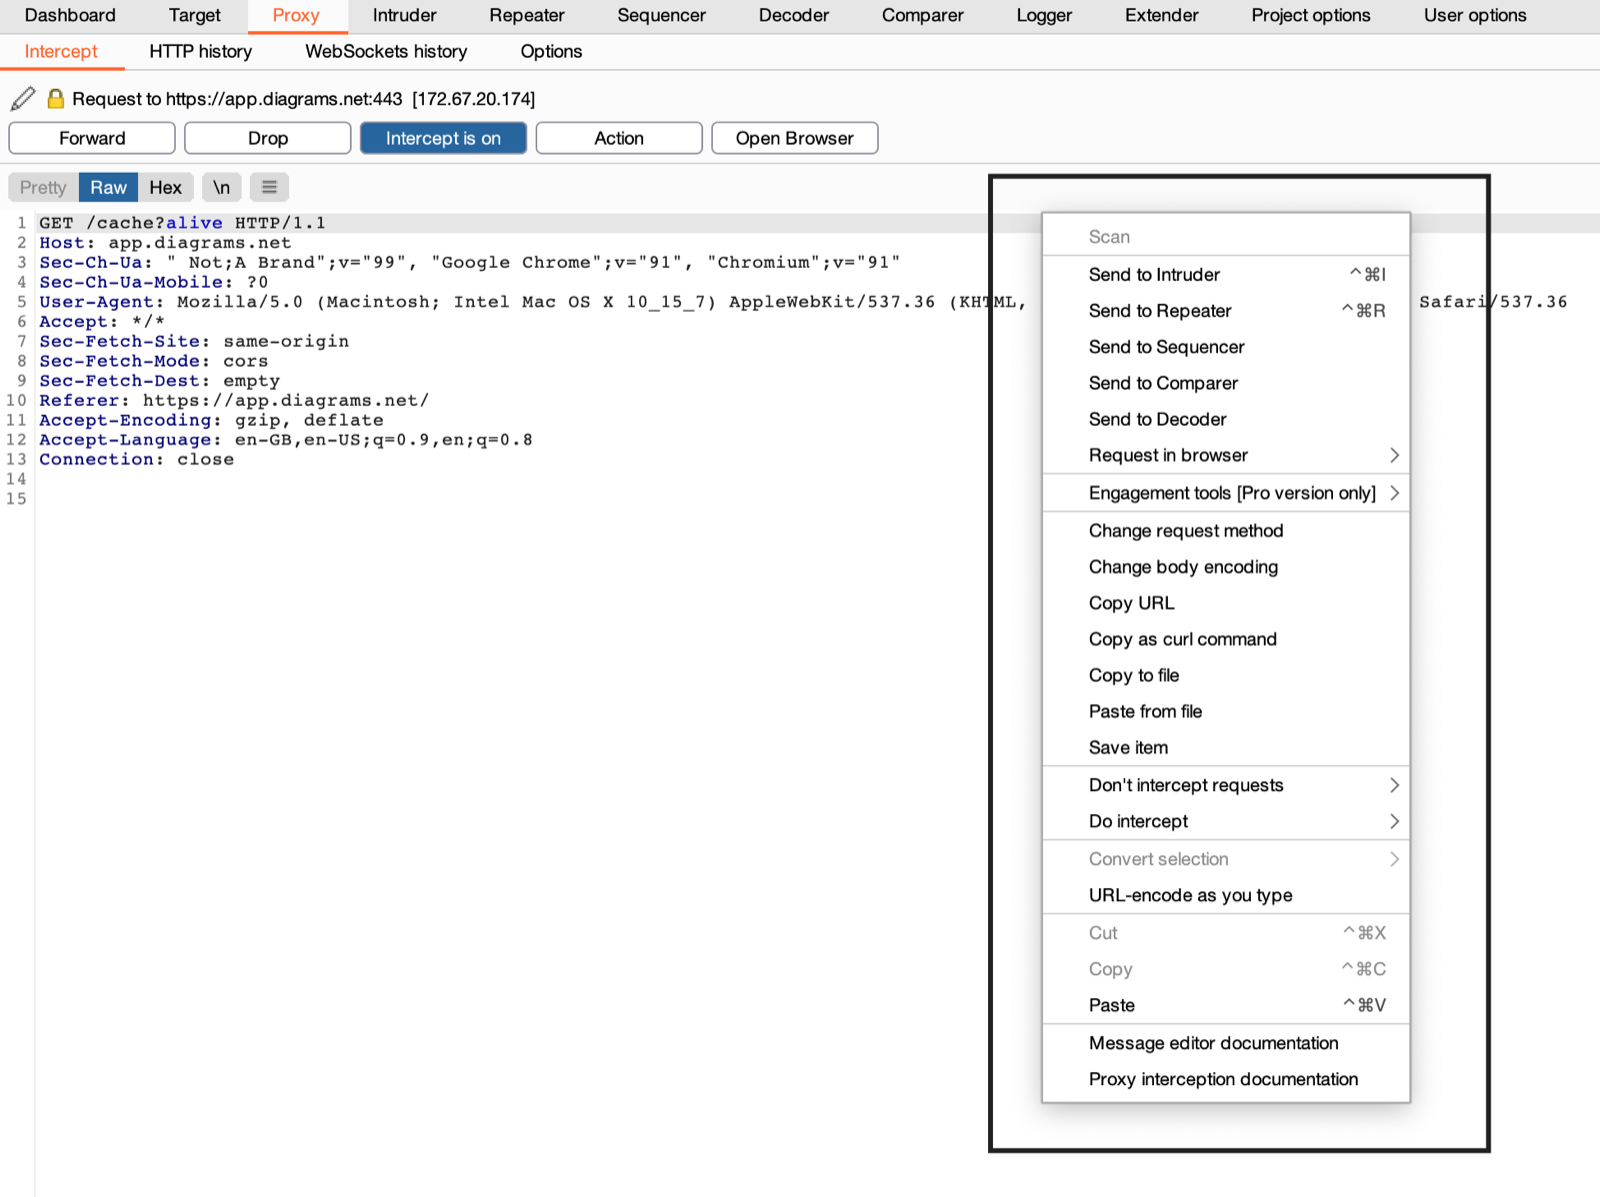
Also, we can send this particular request to another tab as well by right-clicking on the request and then choosing whether to send it to intruder or repeater or so on.
Intruder#
Using the Intruder tab we can automate customized attacks against the web app, Customizing means in a particular request we can specify various positions and also a payload, then what intruder will do is for each payload it will send a request to the server by replacing payload in the Request and log all HTTP Responses, This is useful in a scenario where we need to brute force some specific parameters or headers, And also helpful in enumerating Id’s, and fuzzing the application for vulnerabilities.
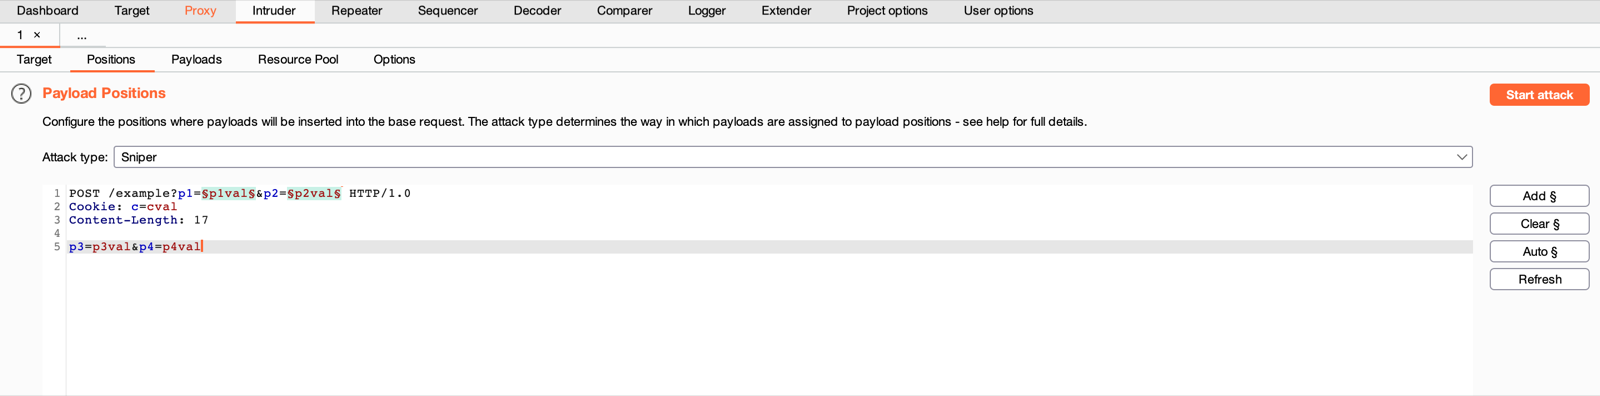
Here in the Intruder tab, we can specify the positions of payload, to do so simply select the position and then click on Add from the right panel. Once selected the position will be shown highlighted as var1 & var2 in the request.
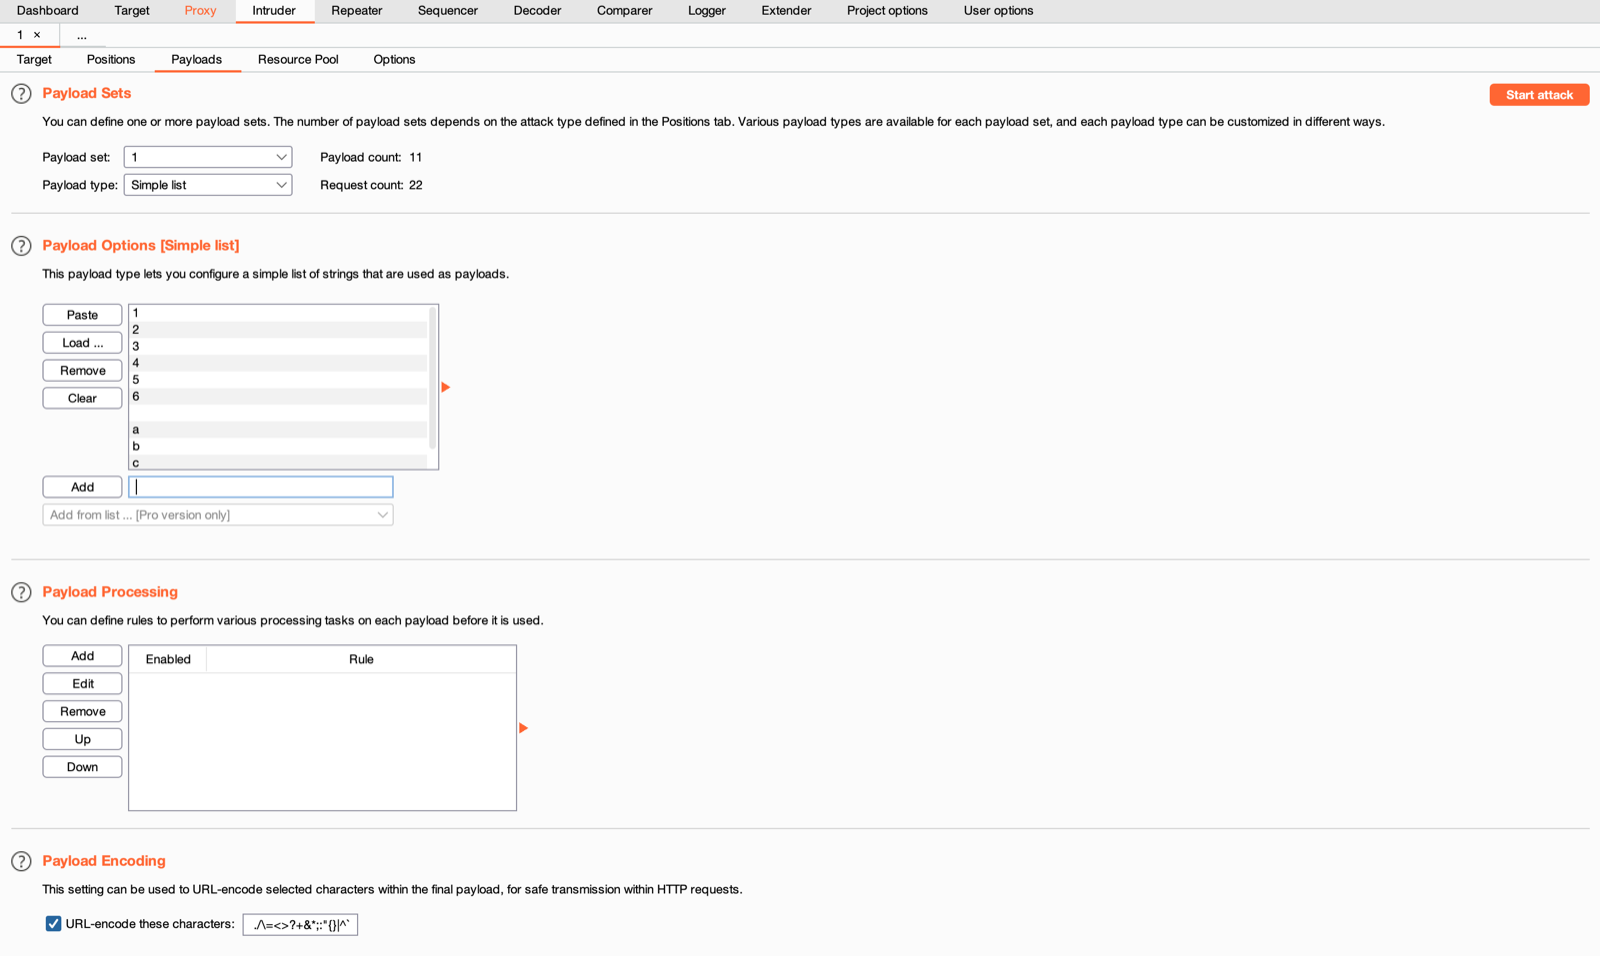
After the positions are specified we need to select the payload to use this could be any custom list of numbers characters or words or you can also use prebuilt dictionaries, Most famous and useful is Seclist It includes various types of wordlists ranging from directories to username and passwords and so on, this would be very helpful in your journey of the Bug bounty.
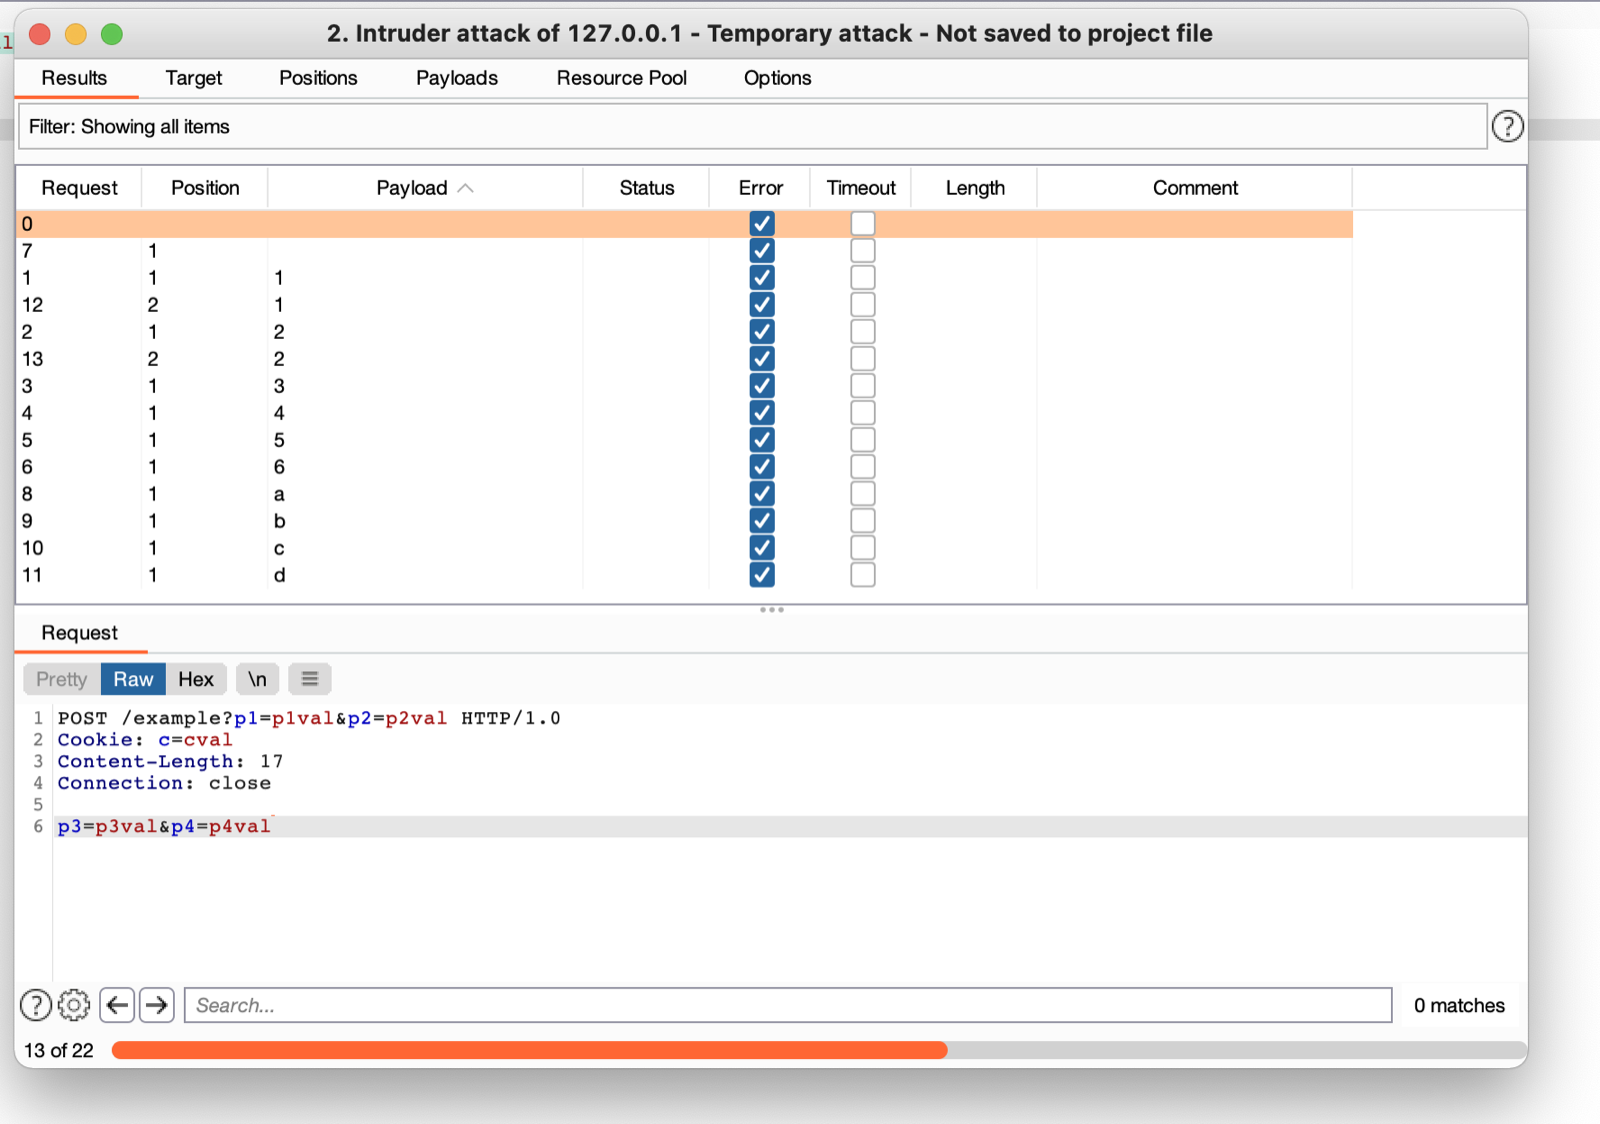
Now as we set the position of payload and list for payload as well, we will start the attack now by clicking on the start attack button at the top right corner, This will open a popup window showing all the requests that were sent along with the responses.
Repeater#
The repeater is useful for repeating manually manipulated requests, This is useful in a scenario where we need to try various payloads on a request, We can do all this on the same page without doing any extra work. Simply Go to Repeater Tab and then play with request and click on Send, the corresponding response will be shown on the right panel.
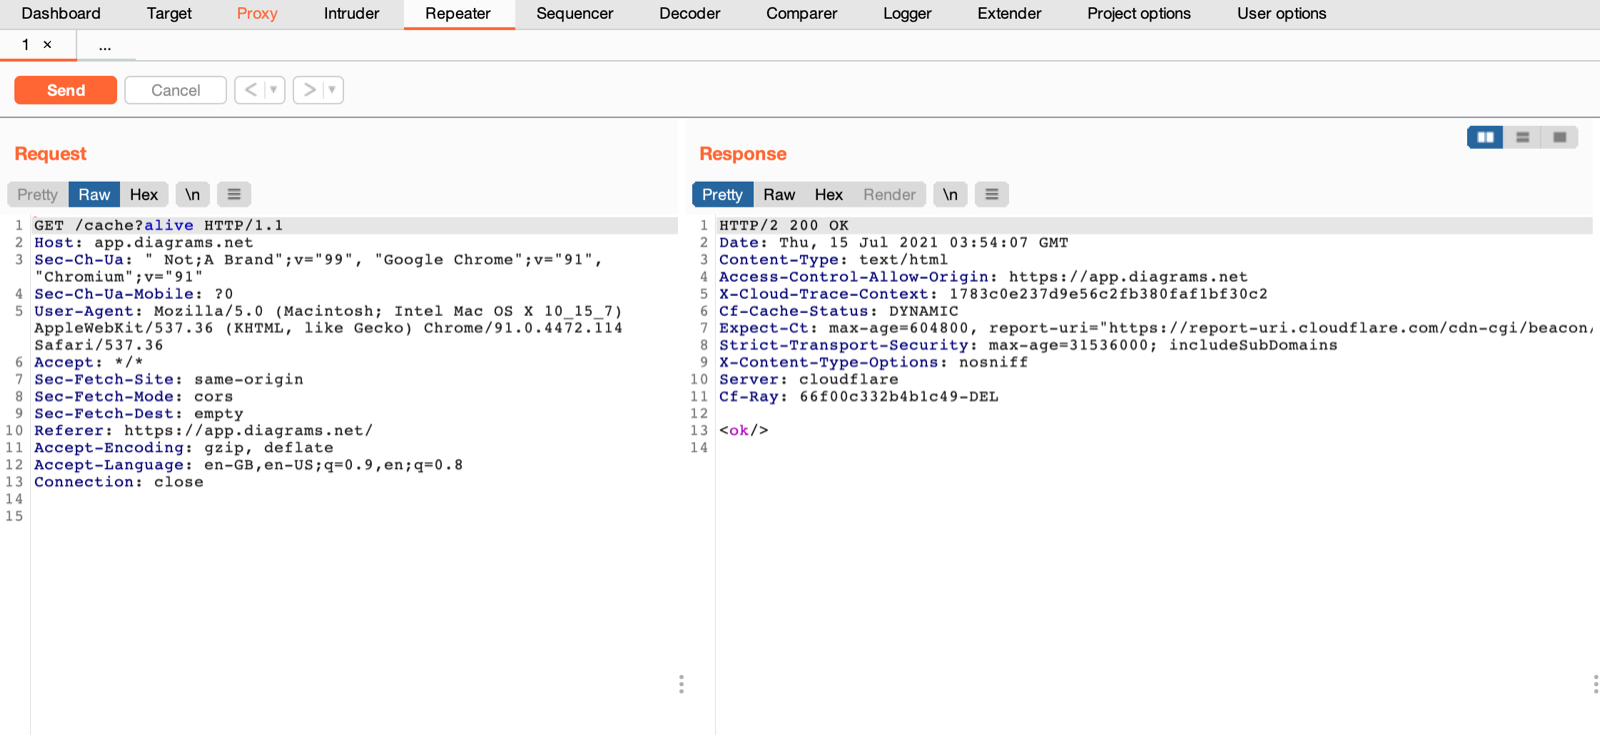
This could be useful in testing a set of specific parameters on the same request and reissuing requests manually to verify responses
Sequencer#
This tab is used to test or analyze the quality of randomness of data, It is good for testing the data or parameters which are meant to be unpredictable, For example, CSRF token, password reset token, and so on.
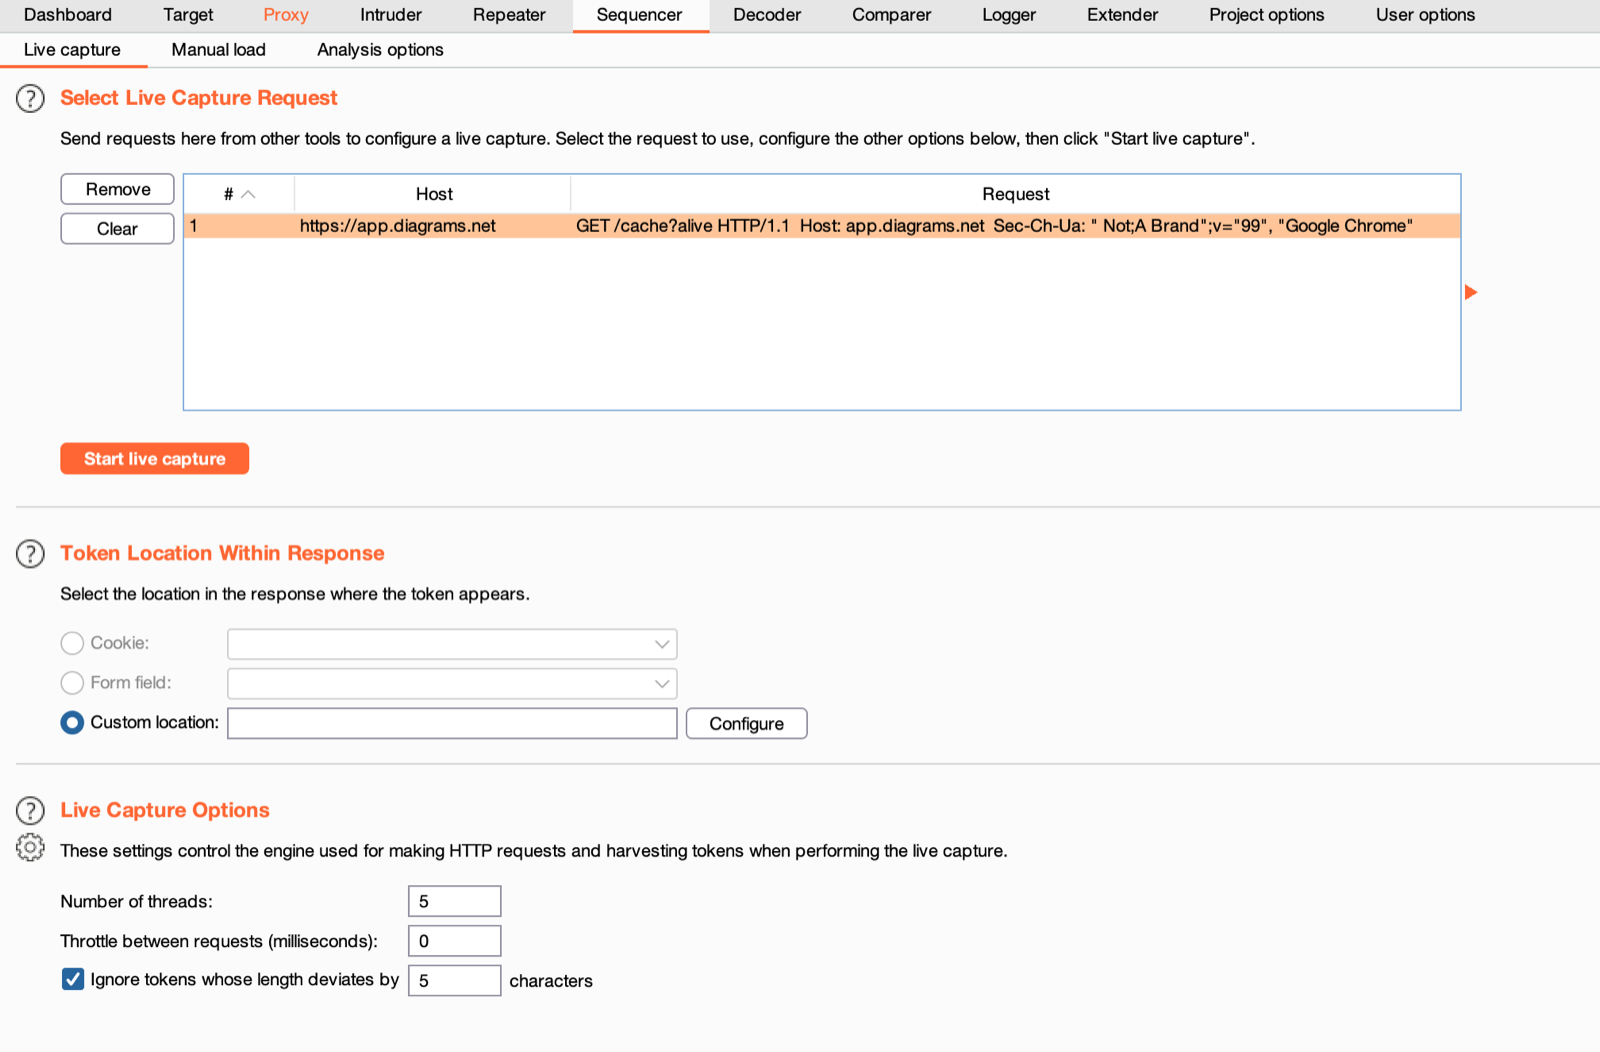
Here we need to select a request to capture on and then specify the location of the token in the response we need to test for, after specifying the custom location of the token we can start the live capture then burp will send various requests sequentially and then analyze those tokens for randomness.
Happy Hunting 🔍🐞